Abusing Customizable Selects | CSS-Tricks
Web browsers ship new features all the time, but what fun is it if we can’t build silly and fun things with them?
In this article, let’s go over a few demos that I’ve made by using the new customizable feature, and walk through the main steps and techniques that I’ve used to implement them.
I hope they get you as excited as I am about custom selects, and give you just about enough knowledge to get started creating your own. Yours might be more, you know, useful than mine, and probably for good reasons, but I like going a little bit overboard on silly ideas because that gives me a better chance to learn.
Before we start, a word about browser support: the demos in this article only run on recent Chromium-based browsers because that’s where customizable selects are implemented right now. However, this feature is designed in a way that doesn’t break non-supporting browsers. After all, a customized element is still a element. So, if the browser you’re using doesn’t support customizable selects, you’ll just see normal selects and options in these demos, and that’s great. It’ll just be a lot less fun.
Curved stack of folders
Let’s get started with the first demo: a stack of folders to pick from, with a twist:
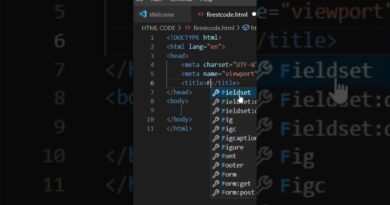
We’ll start with some HTML code first. We don’t need a lot of complicated markup here because each option is just the name of the folder. We can draw the folder icons later with CSS only.
You’ll notice that we’ve used elements inside the elements, to wrap each folder name. That’s going to be useful for styling the selected folder name later. Even though this is just a , being able to do this is quite a big change from what was previously possible.
That’s because, up until very recently, s could only contain text, because that’s the only thing that could appear inside options of a select. The HTML parser has now been relaxed to allow for a lot more HTML elements to be embedded in options. Browsers that don’t support customizable selects will just ignore these extra elements and display the text only.
So, here’s what our stack of folders looks like so far:
Next up, and this is the most important thing you’ll want to do to opt into the customizable select feature: let’s reset the default appearance of the select and its dropdown part, by using the ::picker() pseudo-element:
select,
::picker(select) {
  appearance: base-select;
}
This CSS rule does a lot for us: it unlocks full styling capabilities for the entire select, including its button, dropdown, and options. Without this opt-in, you get a standard select.
Now let’s style the select, starting with its button part. First, we’ll get rid of the picker icon by using the new ::picker-icon pseudo-element to hide it:
select::picker-icon {
  display: none;
}
Next, let’s add a bit more styles to create a nice-looking button:
select {
  background: linear-gradient(
    135deg,
    rgba(40, 40, 50, 0.4) 0%,
    rgba(60, 60, 70, 0.25) 50%,
    rgba(50, 50, 60, 0.35) 100%
  );
  backdrop-filter: blur(12px) saturate(180%);
  box-shadow:
    0 8px 32px rgba(0, 0, 0, 0.2),
    inset 0 1px 1px rgba(255, 255, 255, 0.15),
    inset 0 -1px 1px rgba(0, 0, 0, 0.1);
  border: 1px solid rgba(255, 255, 255, 0.2);
  color: white;
  min-inline-size: 12rem;
}
And here is our new select button:

Now let’s turn our attention to the dropdown part since this is where the magic happens.
In a select, the dropdown contains all the options and appears when you click on the button. A lot of browser default styles apply to it already to set its position, background-color, margin, and more. So, we’ll have to disable and override a bunch of stuff.
In our demo, we don’t want the dropdown to be visible at all. Instead, we want each individual option (each folder in this case) to appear as if floating above the page, without a container element.
To do this, let’s use the ::picker(select) pseudo-element to set our styles:
::picker(select) {
  background: transparent;
  border: none;
  box-shadow: none;
  overflow: visible;
}
And with this, the dropdown isn’t visible anymore and it no longer constrains the options or clips them if they overflow the dropdown area.
This gives us the following improvements:

It’s now time to turn our attention to the option elements. First, let’s replace the checkmark icon with a little disc icon instead by using the ::checkmark pseudo-element:
option::checkmark {
  content: "●";
  color: #222;
}
This pseudo-element makes it easy to change the shape, the color, or even the size of the checkmark.
Let’s also add an additional pseudo-element to each option, by using option::before, to display a folder emoji next to each option. And, with a pinch more CSS fine tuning, we end up with this:

We now have a list of folders which floats on top of the page when we click the select button. It works like any other select, too, either with the mouse, or with the keyboard, so we can just thank the browser for maintaining the accessibility of the input while we’re having fun with CSS.
Let’s now apply some CSS transformation to make the stack of folders a little curvy, so it looks cooler.
To achieve this, we’ll need one more piece of new CSS syntax which, unfortunately, isn’t yet widely available: the sibling-index() function. This function returns the index of the element within its siblings. The sibling-count() function also exists, and it returns the total number of siblings, but we won’t need it here.
Having access to the index of the current element within its siblings means that we can style each option depending on its position within the select dropdown. This is exactly what we need to make the options appear at a gradually larger angle.
Here is the code:
option {
  --rotation-offset: -4deg;
  rotate: calc(sibling-index() * var(--rotation-offset));
}
In this code snippet, we first create a custom property called --rotation-offset, which defines the angle by which each option should rotate, with respect to the previous option. We then use this with the rotate property, multiplying its value by sibling-index(). That way, the first option is rotated by -4 degrees, the second one by -8 degrees, the third by -12 degrees, and so on.
Now, that’s not enough on its own to create the illusion of a curved stack of folders because each folder rotates around its own point of origin, which is located in the top-left corner of each folder by default. Right now, we get this:

Let’s use the transform-origin property to set a shared point of origin around which all options will rotate. Because transform-origin is relative to each individual element, we need to use the sibling-index() function again to move all origin points up and to the right so they’re all in the same spot:
option {
  --rotation-offset: -4deg;
  rotate: calc(sibling-index() * var(--rotation-offset));
  transform-origin: right calc(sibling-index() * -1.5rem);
}
And with this, we get the following result:

The final step is to animate the options. It looks great as it is, but we want the stack of folders to get gradually curved until it reaches its final shape. That’ll make it a lore more lively and fun to interact with.
Let’s reset the option’s rotation by default, and apply a transition with a nice elastic easing function:
option {
  rotate: 0deg;
  transition: rotate 0.3s cubic-bezier(0.34, 1.56, 0.64, 1);
}
And now, let’s apply the right rotation angle only when the select is open:
select:open option {
  rotate: calc(sibling-index() * -1 *  var(--rotation-offset));
}
Unfortunately, the above is not enough. By default, CSS transitions are not triggered when an element appears, which is the case for our options. Thankfully, there’s a fix for this issue: the @starting-style at-rule. This at-rule lets us define the initial state of the options, making it possible for the transition to play right when the options appear:
@starting-style {
  select:open option {
    rotate: 0deg;
  }
}
One more thing to make it even nicer. Let’s delay each transition relative to the previous one to make it look like each folder comes in slightly after the one before it. To achieve this, let’s use the sibling-index() function once more, as a multiplier to a short transition delay:
option {
  transition-delay: calc((sibling-index() - 1) * 0.01s);
}
We now have an animated, curved, stack of folders implemented with a element! Check out the demo and code in the next CodePen:
CSS gains a lot of new capabilities each year. I hope this demo walk through helped you get a better understanding of some of these new capabilities. Building it helped me understand a lot of new, to me, concepts. It also got me very excited about the customizable select feature. So much, that I created other demos too. So, let’s look at two more of them. This time though, we’ll go quicker and only highlight the most important parts.
Fanned deck of cards
For our second demo, we’ll create a card picker, which opens up in a fanned deck fashion:
The HTML markup for this demo is a little different than for the previous one. Each card has a bit of content to display, so let’s create a couple of elements to each option:
The other interesting thing about the HTML code we’ll use here, is the addition of an empty element right below the opening tag:
This empty serves a very specific purpose: it prevents the default
In a customized select, the browser automatically displays the currently selected option’s content (in this case, the card face) in the button area of the select. And it does this by creating an element named . This tells the browser not to insert its own element:
select {
  background:
    /* Diamond pattern overlay */
    repeating-linear-gradient(45deg,
      transparent,
      transparent 1vmin,
      rgba(255, 255, 255, 0.05) 1vmin,
      rgba(255, 255, 255, 0.05) 2vmin),
    repeating-linear-gradient(-45deg,
      transparent,
      transparent 1vmin,
      rgba(255, 255, 255, 0.05) 1vmin,
      rgba(255, 255, 255, 0.05) 2vmin),
    /* Base gradient */
    linear-gradient(135deg, #8b0000 0%, #dc143c 50%, #8b0000 100%);
}
Now, for the dropdown part, just like in the previous demo, we don’t want the dropdown container element to be visible, so we’ll also override the default background, border, and overflow styles like we did before.
More importantly, the position of the deck of cards, when opened, is very important. We want it to fan out from the deck itself and remain centered above it.
In a customizable select, the dropdown part, i.e., the ::picker(select) pseudo-element, is positioned relative to the button part thanks to anchor positioning, which is great because we can override it!
In our case, let’s override the alignment relative to the anchor, which is the button, by using the position-area property:
::picker(select) {
  position-area: center center;
  inset: 0;
}
We’re also setting the inset property to 0 here. This sets all top, right, bottom, and left properties to 0 in a single declaration, which makes the dropdown part able to use the entire available space, rather than being constrained by the browser to appear on the side of the select button.
Finally, let’s make the cards appear side by side, rather than above each other:
select:open::picker(select) {
  display: flex;
}
When the select element is open and the options are visible, we now see this:

The next step is to rotate each card so the options appear in a fanned out way, with the center card straight, the cards to the left gradually more rotated towards the left, and the cards to the right rotated towards the right.
To do this, you’ve guessed it, we’ll use the sibling-index() property again. We’ll also use the sibling-count() property this time:
option {
  --card-fan-rotation: 7deg;
  --card-fan-spread: -11vmin;
  --option-index: calc(sibling-index() - 1);
  --center: calc(sibling-count() / 2);
  --offset-from-center: calc(var(--option-index) - var(--center));

  rotate: calc(var(--offset-from-center) * var(--card-fan-rotation));
  translate: calc(var(--offset-from-center) * var(--card-fan-spread)) 0;
  transform-origin: center 75vmin;
}
In the above code snippet, we’re calculating the offset of each card relative to the center card, and we’re using this to rotate each card by increments of 7 degrees. For example, in a deck with 9 cards, the left-most card (i.e., the first card) will get a -4 offset, and will be rotated by -4 * 7 = -28 degrees, while the right-most card will be rotated by 28 degrees.
We also use the translate property to bring the cards close together into a fan, and the `transform-origin` property to make it all look perfect.

Finally, let’s bring it all together by animating the opening of the deck. To do this, we can define a CSS transition on the custom --card-fan-rotation property. Animating it from 0 to 7 degrees is all we need to create the illusion we’re after. Animating a custom property takes a couple of steps.
First, let’s define the custom property’s type, so that the browser can animate it correctly:
@property --card-fan-rotation {
  syntax: '';
  inherits: false;
  initial-value: 7deg;
}
Second, let’s use a @starting-style at-rule, like in the previous demo, to allow the CSS transition to play when the options appear:
@starting-style {
  select:open option {
  --card-fan-rotation: 0deg;
  }
}
Then, set the starting rotation angle when the select element is closed, and define the CSS transition:
option {
  --card-fan-rotation: 0deg;
  transition: --card-fan-rotation 0.2s ease-out;
}
And, finally, let’s set the final angle when the select is opened:
select:open option {
  --card-fan-rotation: initial;
}
We can use the `initial` value above instead of hard-coding the 7deg value again, since it’s already defined as the initial value in the @property rule above.
That’s it, our deck of cards, with animated opening, is now ready! Check out the complete code and live demo in this CodePen:
It’s amazing to me how far customizable selects allow you to push things. You don’t only get to override the way the button and its options look, you get to change how everything is positioned, and even animated.
Let’s close with one final demo.
Radial emoji picker
Just like in the previous demo, here we want the emojis to be centered around the select button. To achieve this, let’s override the default anchor positioning of the dropdown part.
This time, we’ll use the anchor() function to set the top and left coordinates of the dropdown container:
::picker(select) {
  top: calc(anchor(top) - var(--radius));
  left: calc(anchor(left) - var(--radius));
  width: calc(var(--radius) * 2 + var(--option-size));
  height: calc(var(--radius) * 2 + var(--option-size));
}
In this code snippet, the --radius property is the radius of the circle of emojis. And, since customizable selects already use anchor positioning, we can use the anchor() function to position the dropdown relative to the button.
Now we need to position the options in a circle, inside the dropdown. As it turns out, CSS knows trigonometry now, too, so we’ll use the cos() and sin() functions together with the sibling-index() and sibling-count() functions:
option {
  position: absolute;
  --angle: calc((sibling-index() - 2) * (360deg / (sibling-count() - 1)) - 90deg);
  top: 50%;
  left: 50%;
  translate:
    calc(-50% + cos(var(--angle)) * var(--radius)) calc(-50% + sin(var(--angle)) * var(--radius));
}
And there we are:

The final demo also contains a bit of code for animating the opening of the options, but we won’t dig into the details in this article.
To learn more and play with the live demo, check out this CodePen:
Wrapping up
That’s it for now. I hope these demos have given you a bit more of an understanding for how customizable selects are customized, and some excitement for actually using the feature in a real project.
Keep in mind, even when customized, the element is still a and will work just fine in non-supporting browsers. So, even if the feature is still in its early days, you can use it as a great progressive enhancement.